
1) Time can be tracked against Cases as well as projects.
2) Business process flow for timesheet module:
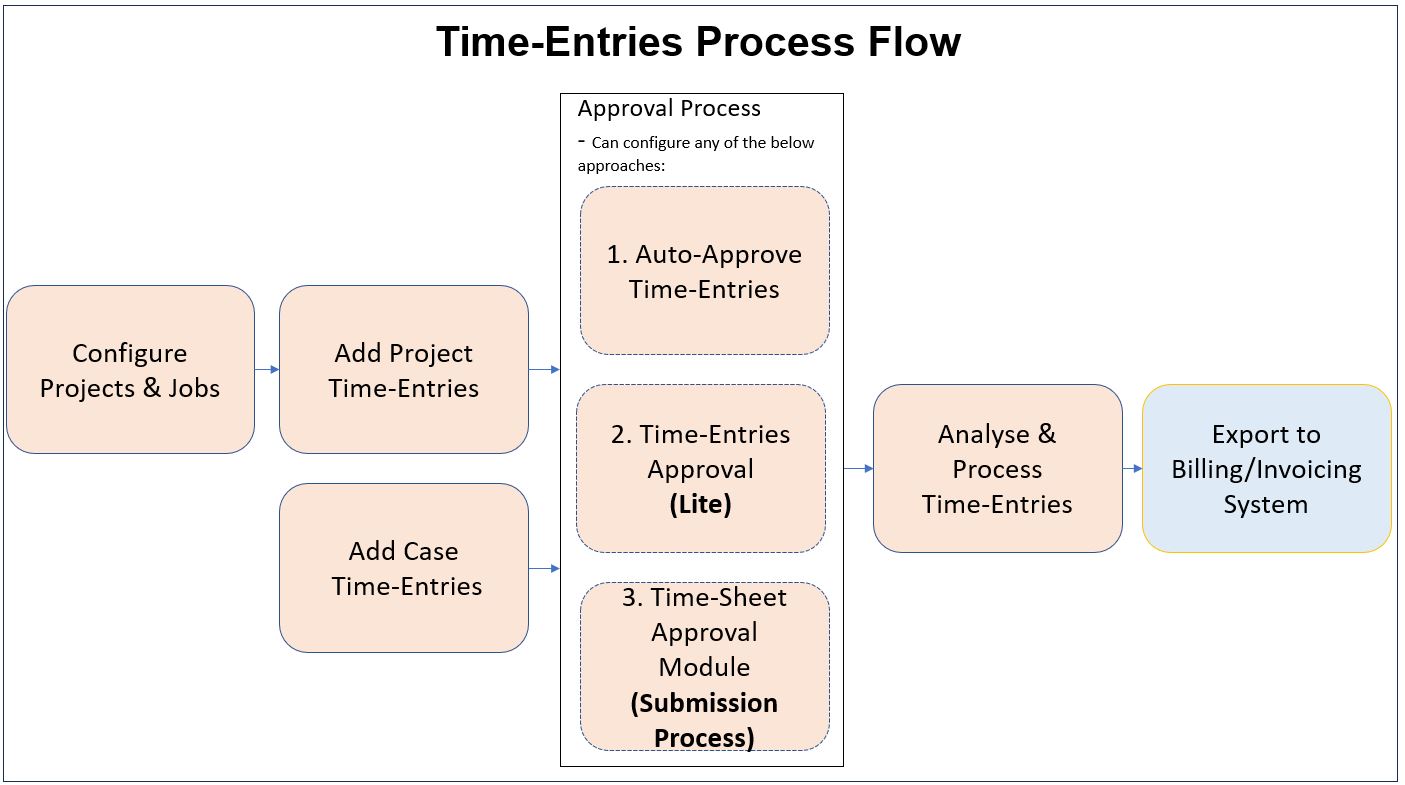
Basic process flow:
– Admin/ Manager creates projects & jobs
– Users can enter daily/weekly/monthly time-logs
– Admin/Manager having “impersonation” permission can also add time-logs for other users
– Admin/Manager can approve the time-entries (multiple approaches)
– Admin can then export all time-entries & send it over to their Billing/Invoicing system
3. For approval process, we provide below approaches:
a. Auto-Approve Time-Entries: If you do not want to follow any approval process… then can set the time-entries to auto-approve on creation for all users.
b. Time-Entry Approval (Lite): This is a simple approval approach.
– Users create time-entries.
– Admin / Manager can approve / reject each time-entries.
Here there is no formal timesheet submission process.
c. Timesheet Approval process flow: This is a thorough approval process… where users will need to submit a timesheet (which is collection of time-entries for a period)…then the approver will either approve or reject the timesheet.
Here approval or rejection cannot be done for individual time-entries …but can be done at timesheet level only.
Below is the process flow for timesheet approval:
– Admin configures the timesheet period (Weekly / Bi-Weekly / Monthly)
– Admin also configures a default approver for each user’s time-entries
– Users can enter daily/weekly/monthly time-logs
– User needs to submit the timesheet (which is a collection of time entries for a given period)
– Timesheet needs to be approved by Manager/Admin
– Admin/Manager having “impersonation” permission can also add time-entries & approve time-sheets for other users.
– Admin can then export all time-entries & send it over to their Billing/Invoicing system
4) For tracking time against internal projects:
– create a dummy customer (e.g. Zap Internal) and then create projects & jobs (e.g. Meetings, Trainings, etc) against this.
5) There are three ways you can create time-entries:
Option 1: Using Timer, as you work
When you start working, open global track time panel…click the play button to start a timer… now edit this timer to select the project and job. When you finish, stop the timer and time-entry gets added automatically to your timesheet.
Option 2: Add time manually, after you have finished
If you don’t want to bother with the timer (or you forgot to start it), you can manually add time entries after the fact. Simply select the project and job, what you worked on, choose start and/or duration, and add the time entry.
Option 3: Using Calendar
You can now create time-entries easily by just dragging the jobs to the Calendar.