
A very common use-case for Sales Users is to generate a Quote PDF from Quote form and send it to Customer in email.
Now if you need to generate this pdf from a Dynamics 365 Report (export) & attach it to email…then it takes about 10+ Clicks!
Using “Zap Report Scheduler” App’s “Export Report (Manually)” feature this can be achieved in just 1-Click!
Let’s see how:
To send Quote in Email to Customer, below are the different approaches using “Export Report” feature:
Approach 1: Click button “Export Report” from Quote form

A small pop-up will display all the configurations that have been created for Quote entity.
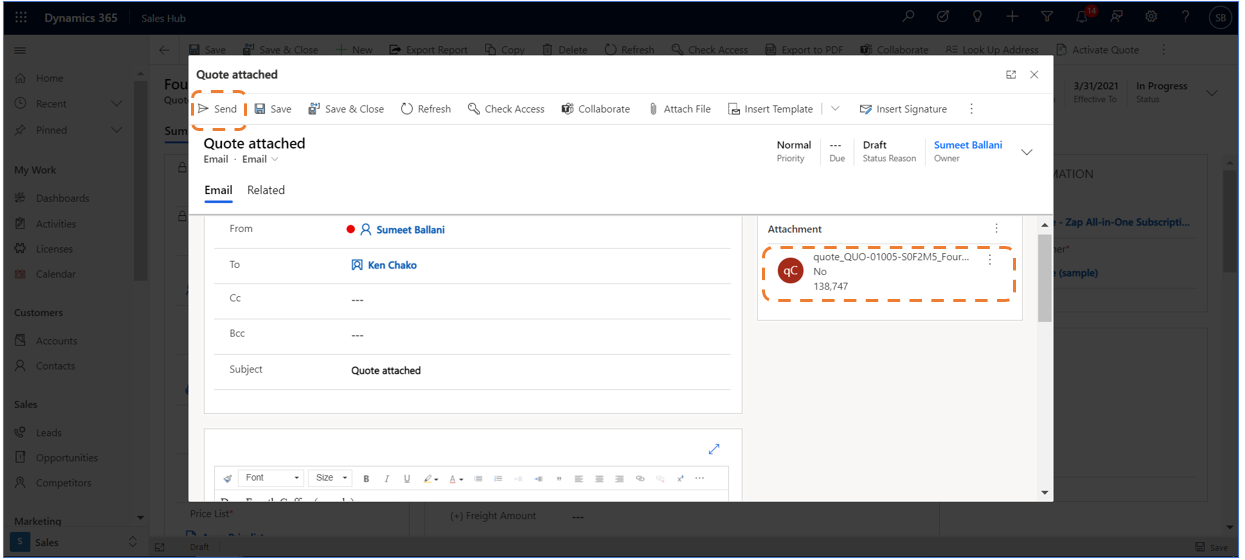
Now Click “Generate” button:

This will open an email record… with pdf copy of report attached…
Here Email Recipients, email subject and body would be automatically populated as per the configuration settings.
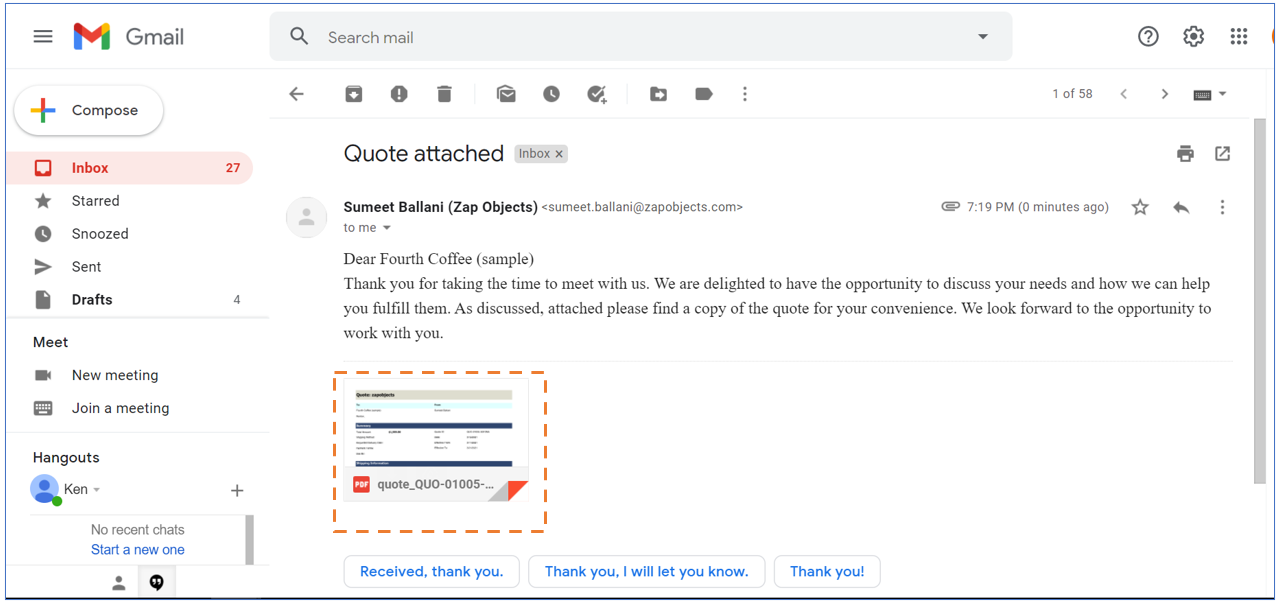
Below shows the screenshot of email received by Customer with the pdf copy of the quote.
Approach 2: 1-Click using Custom button/s which have been added within form!
Refer KB article: https://support.zapobjects.com/zap-app-ssrs-report-scheduler/export-report-feature-manually-approach-2-1-click-using-custom-button/
Configuration steps needed to enable “Export Report” feature:
Pre-requisites for using “Export Report” feature: Trial or paid license activation. (No need to set up Azure app or authentication setup or global settings)
Browse to “Zap Report Scheduler” App… then in left side navigation section… scroll to “Export Report (Manual)”
Now open “Export Report”… and click “New”:

Explanation of form fields:
Section: General
Name: Enter User-Friendly Name. This name will be displayed in the “Configuration Name” field of pop-up form that is displayed when you click button “Export Report”
Entity and Report: Select Entity and Report
Report Action: Download / Attach to Email / Embed in Email / Attach to Notes / Save to SharePoint
For “Save to SharePoint” feature … create Zap RS Authentication Record and configure SharePoint settings. For instructions, refer KB article.
Report Format: PDF / Excel / Word / CSV / TIFF / PPTX
Report File Name: This can be static text or dynamic (populating field values)
Here logical name of field needs to be entered in curly braces {}
E.g. for dynamic file name: Report – {title} – {ticketnumber} – {customerid}
Section: Default Filter
This field will be automatically populated with report filter conditions.
You can modify the values in this and save the record.
Section: Report Parameters
You can set any default report parameters in this section.
Section: Email Parameters
You can select the various email parameters which should be automatically populated in email form when “Attach to Email” option is used.