
This is a pre-requisite step for configuring Zap Helpdesk!
Create a Public Queue (e.g. Zap Support) in Dynamics 365 which will receive the emails from a mailbox address (e.g. support@zapobjects.com)
We will be setting up the mailbox of this support queue as a shared mailbox (in Microsoft Office 365) (you can also use an actual mailbox).
Below are the features of a shared mailbox:
1. Shared mailbox do not consume any license.
2. Shared mailbox does not have any credentials. Users added as members of shared mailbox can access this along with their own mailbox.
Below are the steps needed to set this up:
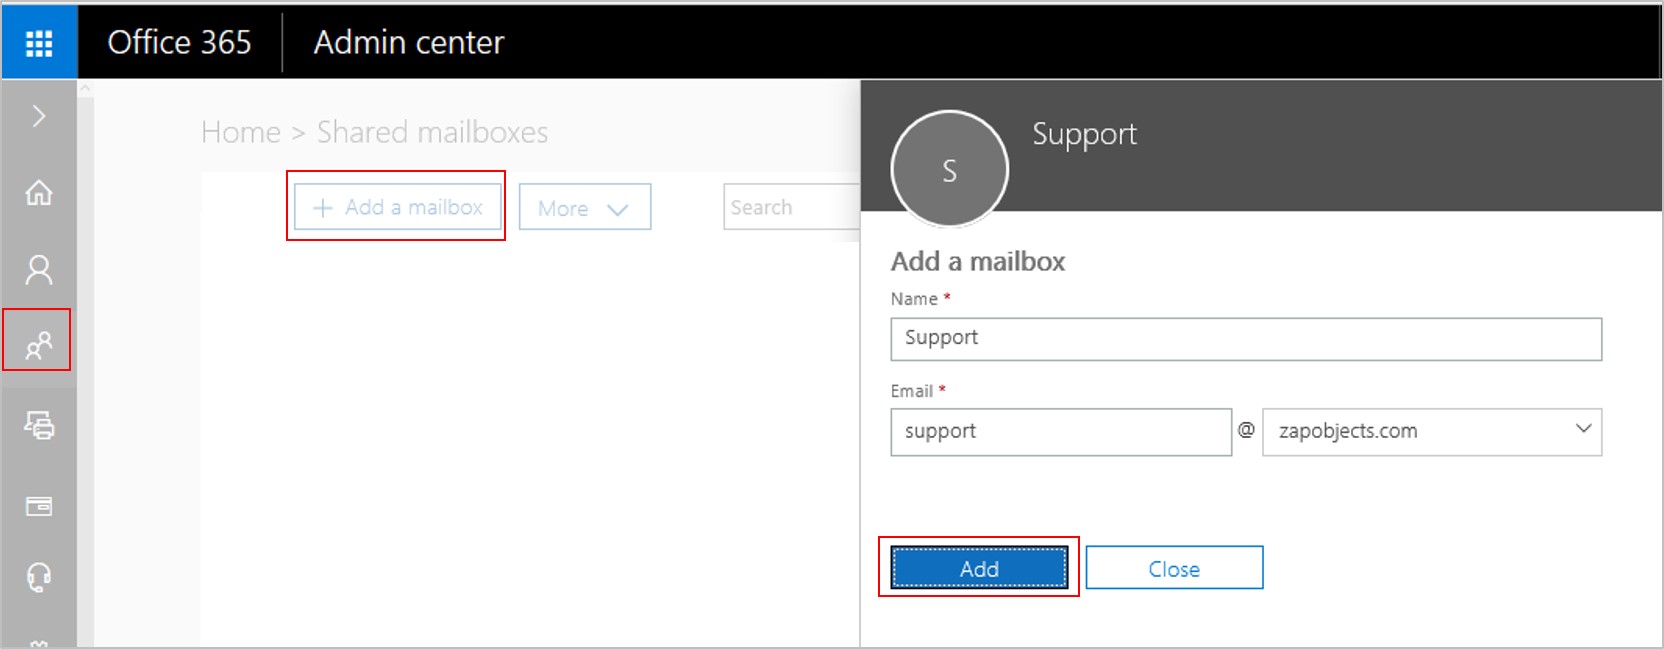
Step 1: Create a shared mailbox in office 365 (e.g. support@zapobjects.com) and add your support team as members of this shared mailbox.
In the Office 365 admin portal select the “Add a mailbox” option under shared mailboxes:
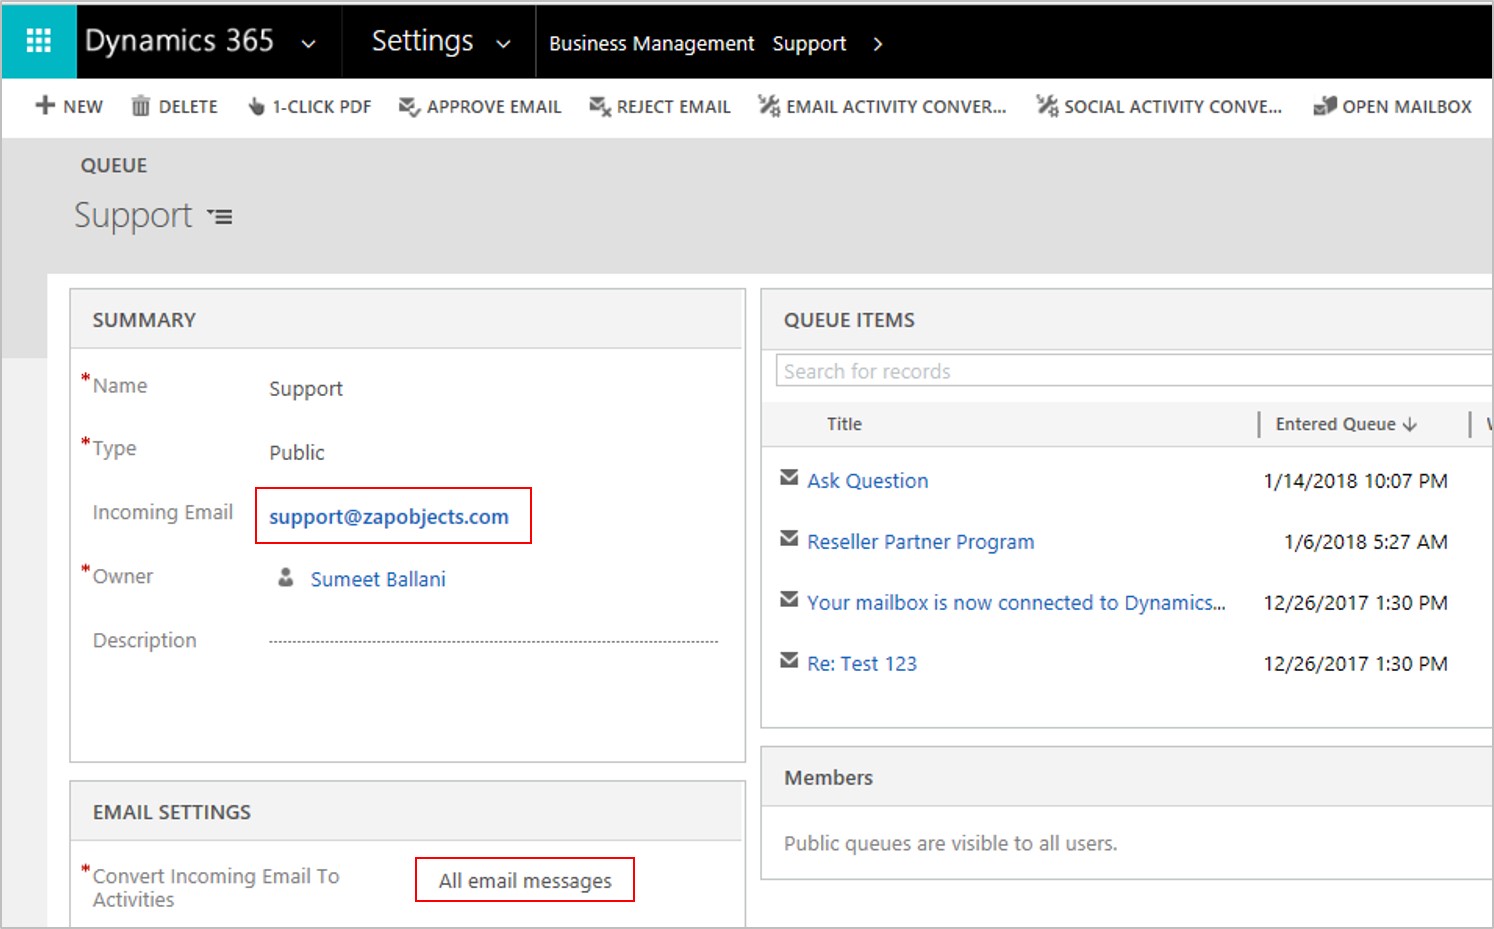
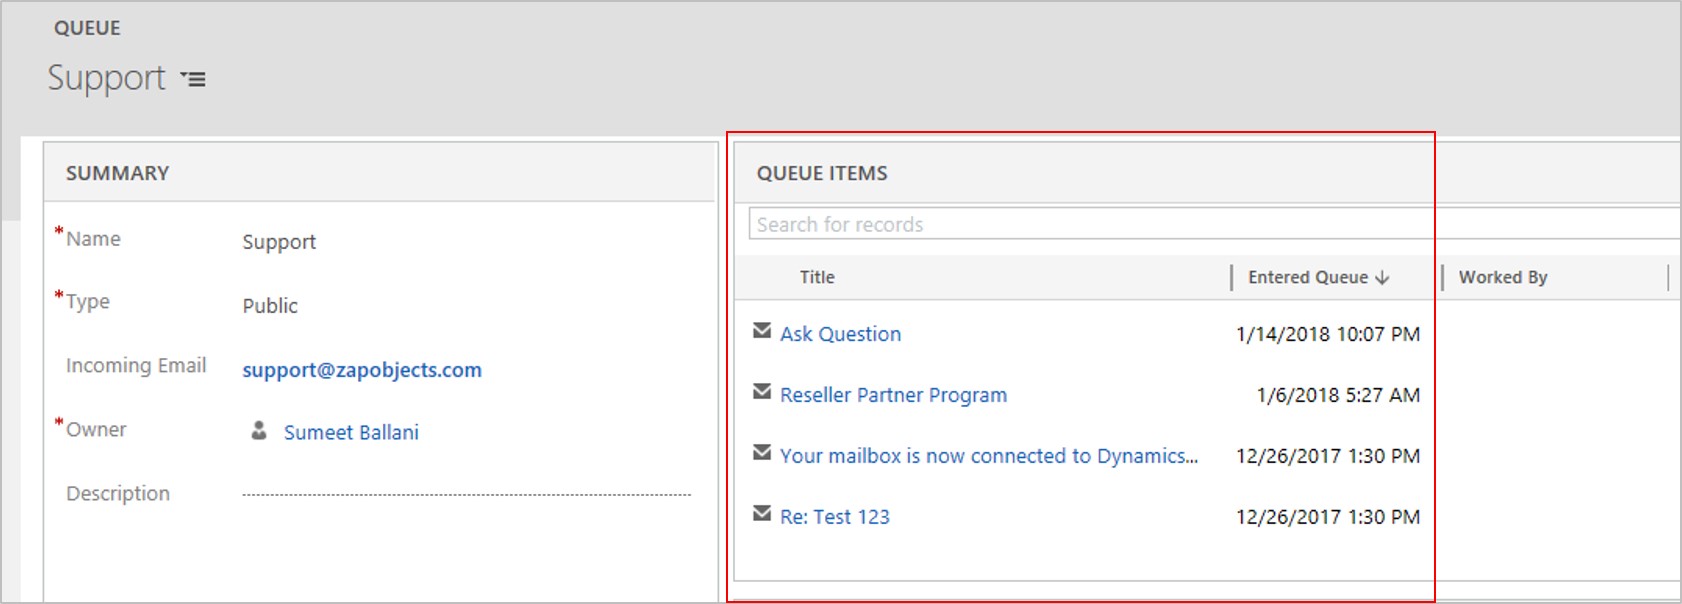
Step 2: In Dynamics 365 CE, create a Queue with email address (e.g. support@zapobjects.com). Browse to Settings >> Business Management >> Queues
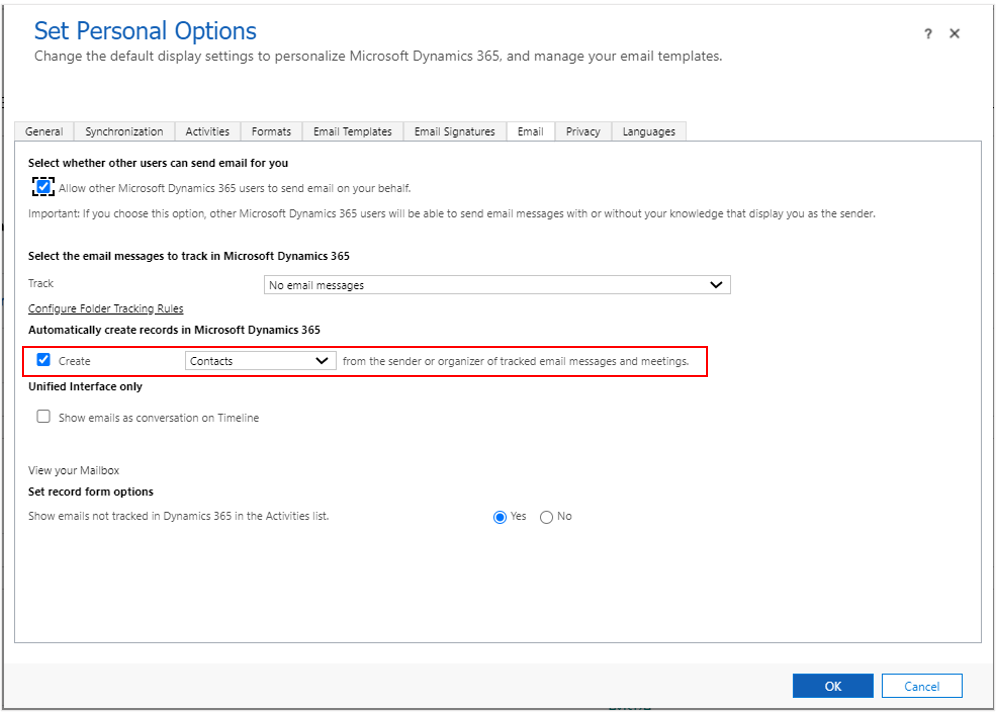
Please note that if you need the contact to be created automatically in Dynamics 365(if no matching contact found based on sender email address) then ensure that the Owner of this Queue has personal setting checked “Create Contacts from the sender or organizer of tracked email messages and meetings.”
Step 3: Configure server side synchronization settings in Dynamics 365 CE for this queue.
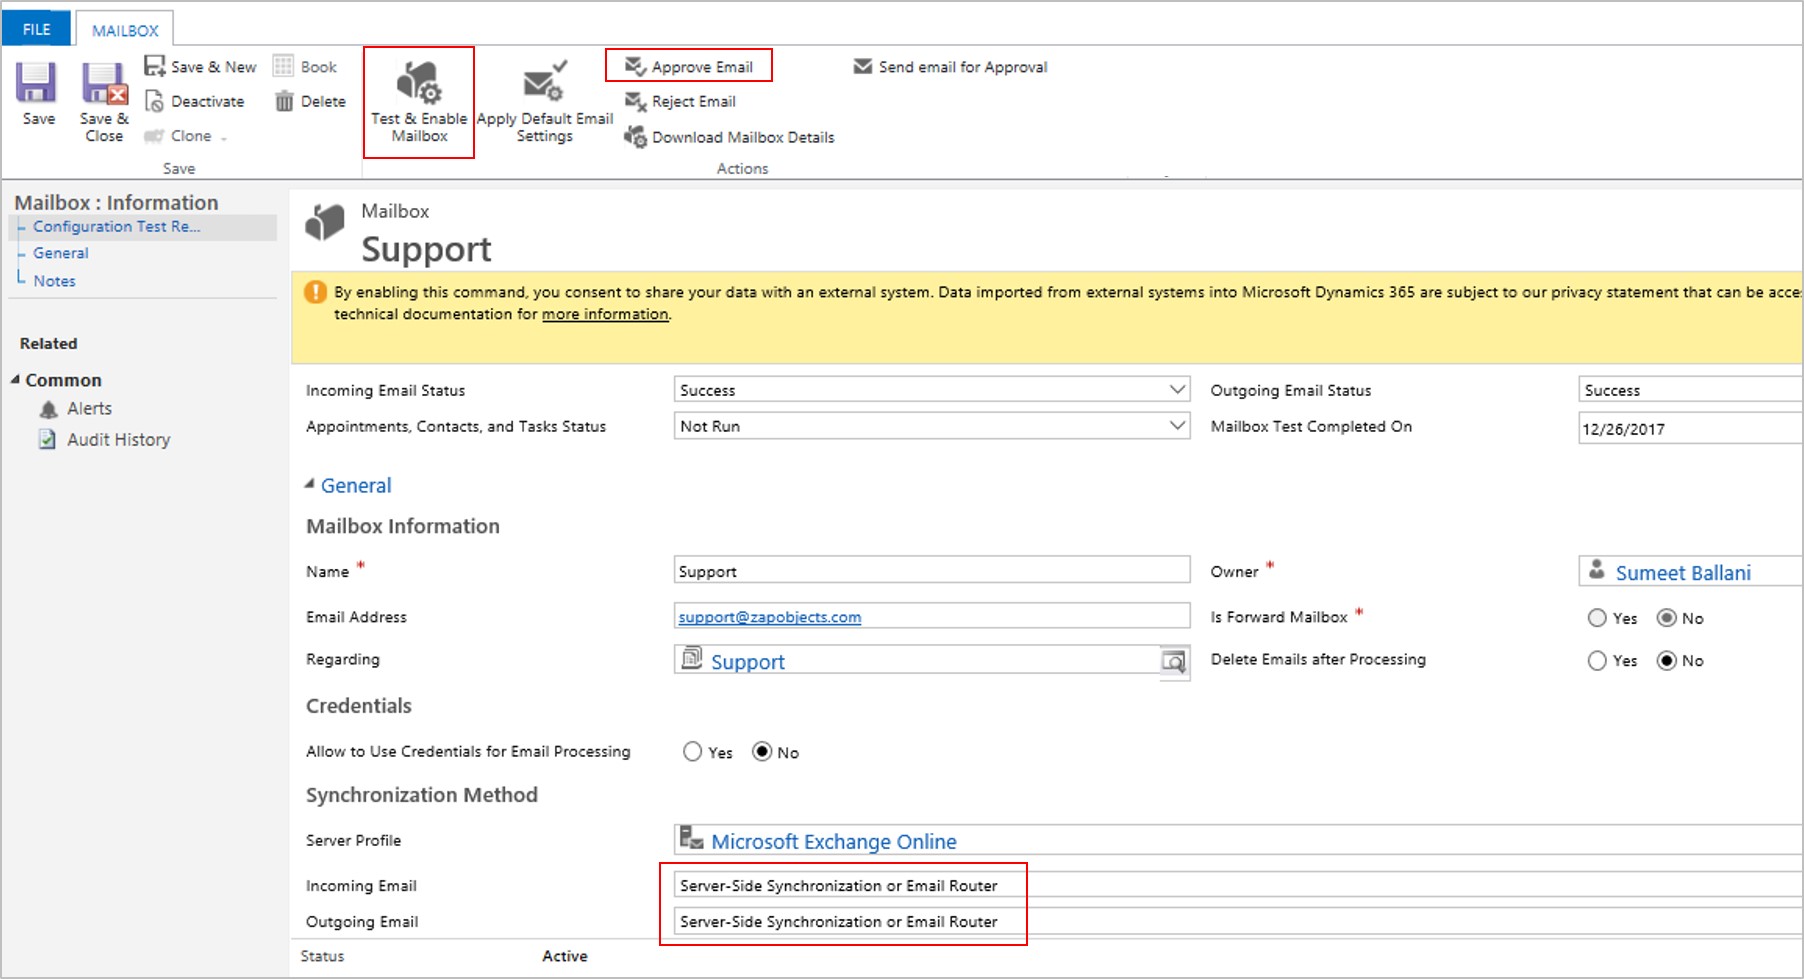
Click “Approve Email” and then click “Test and Enable the mailbox”. Check the “Alerts” section for the status of server side synchronization (Success / Failure).
Emails sent to the support address (support@zapobjects.com) will now be available as Queue items in Dynamics 365 CE!
Once this support queue has been set-up, next step would be to configure Zap Helpdesk App – Email-to-Case!