
//Please note that this feature: ‘Generating Teams Notifications – from Helpdesk App’ is presently in Beta. If you face any issue then email our support team for assistance.
For generating teams notifications from Helpdesk App (for events like Case Created, New Email Response Received from Customer etc), there are 3 steps:
Step 1: Create an Azure App and providing necessary API permissions to post to Teams Channel. (this kb article)
Step 2: Global Settings – Team Auth. Setup (link)
Here we enter the values from Azure App that we created in step 1.
Step 3: Configuring Notification Settings for each Applicable Queue – Tab: Agent Notifications (Teams) (link)
=====================================
The Helpdesk notifications to Teams are sent by using the Graph API. This requires you to register an Azure App and provide the necessary permissions.
Steps for registering an Azure App:
Step 1: Go to Azure portal (https://portal.azure.com/) and select “Azure Active Directory” (in left pane):
Step 2: Select “App registrations” and click on “New registration”:
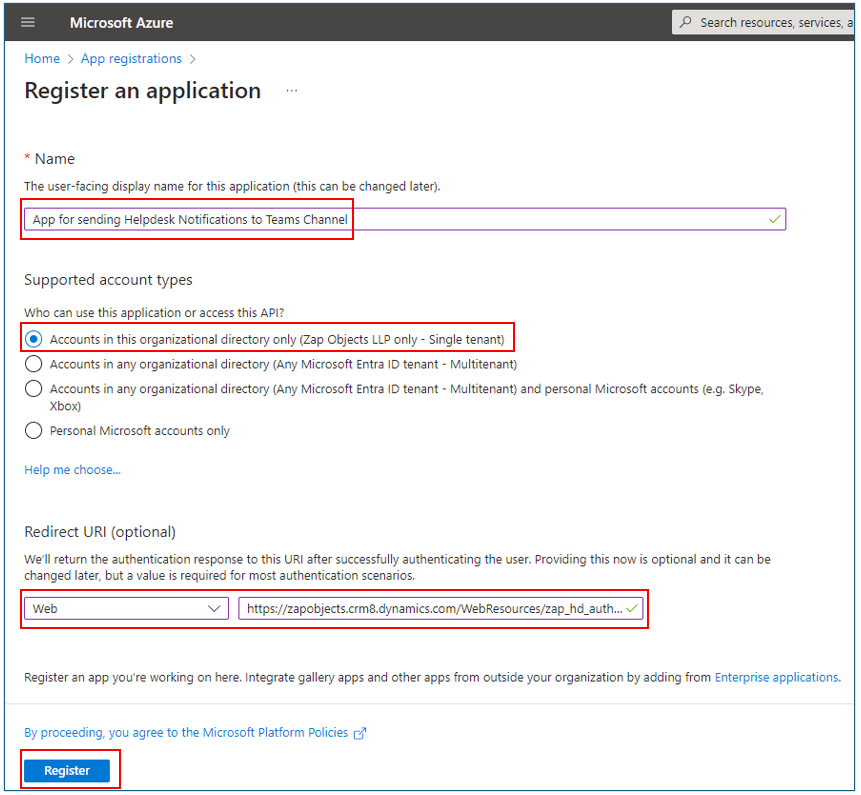
Step 3: In new application registration form:
- Provide an application name. (e.g. App for sending Helpdesk Notifications to Teams Channel)
- Supported account types: Select “Accounts in this organizational directory only”
- Redirect URI: Select “Web” option and enter the URI as below:
https://{{Dynamics 365/Power Apps URL}}/WebResources/zap_hd_authentication.html
e.g. https://zapobjects.crm8.dynamics.com/WebResources/zap_hd_authentication.html - Click “Register”
Step 4: Add permissions to the app for Dynamics CRM & Microsoft Graph API (Delegated Permissions)
Click “Grant admin consent” button… which will further show a confirmation message…click “Yes” to proceed:
Please note that you will need “Global Administrator” privileges to grant admin consent to the App!
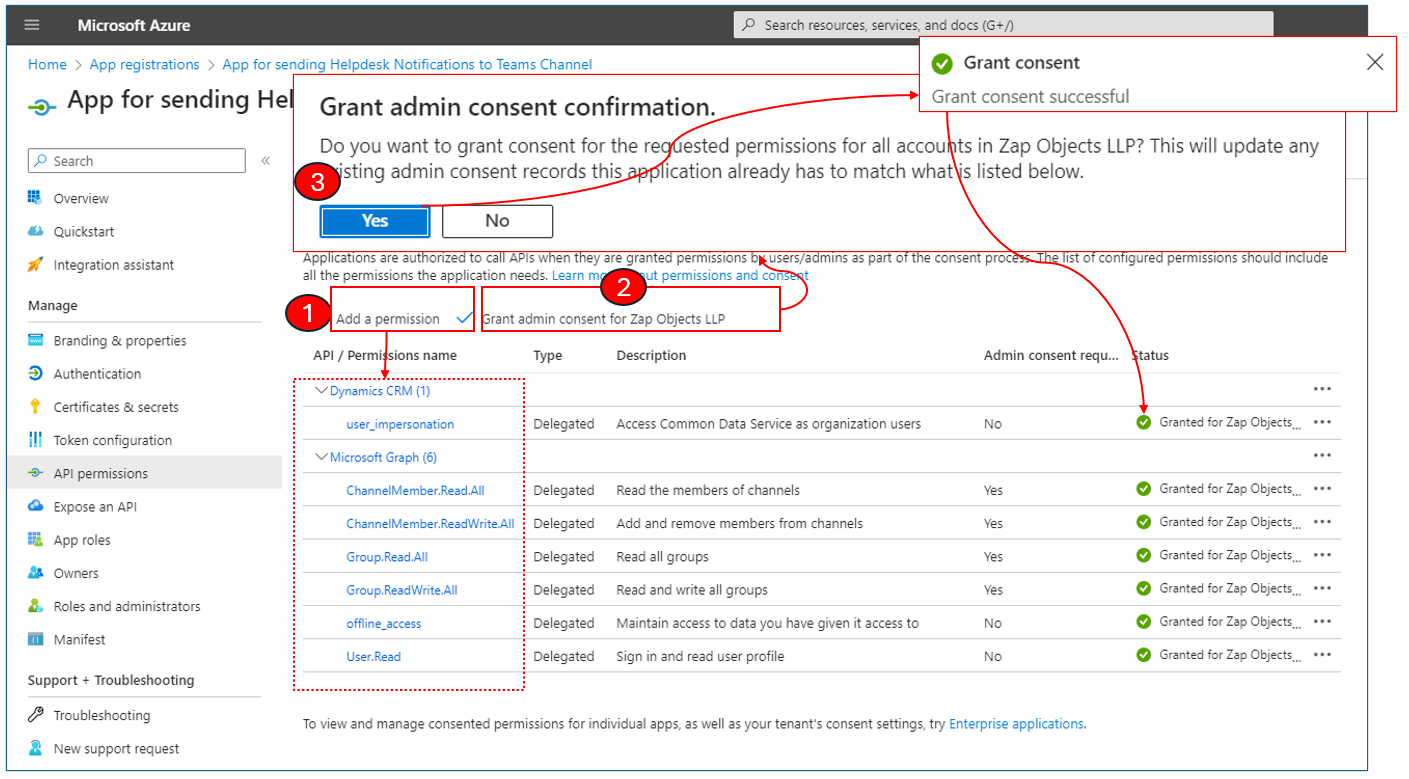
You will receive message “Successfully granted admin consent for the requested permissions”
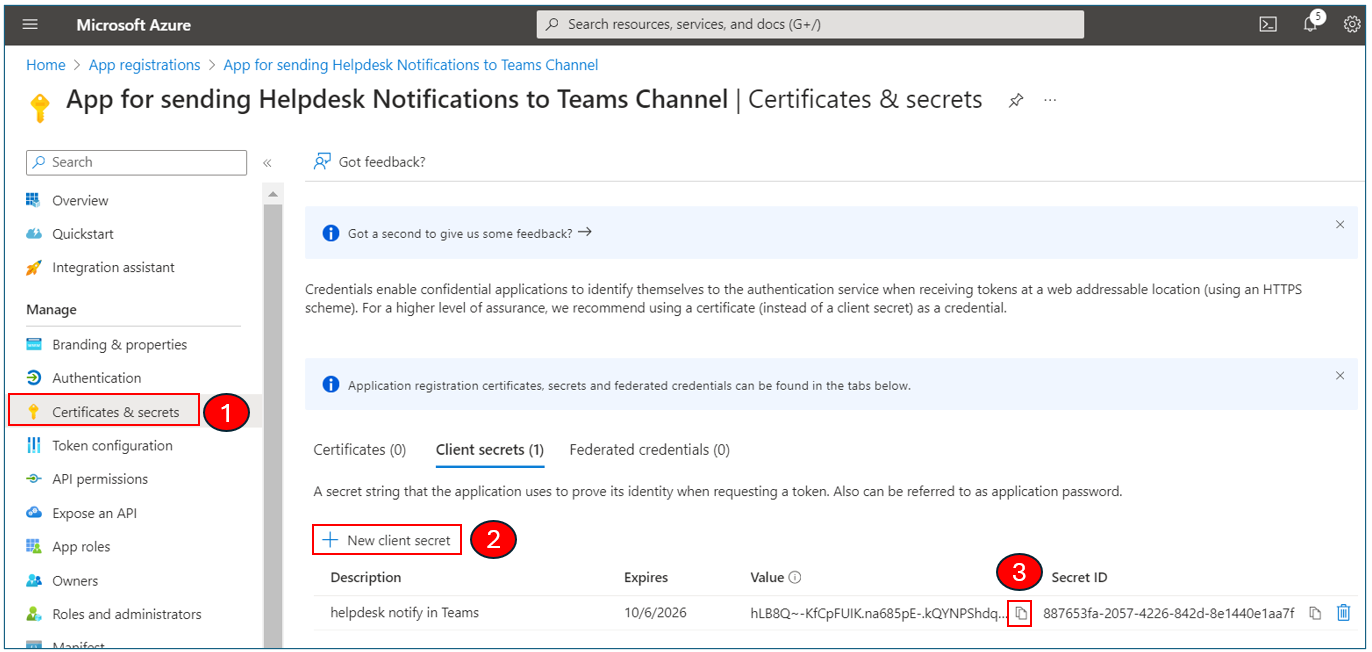
Step 5: Now click “Certificates & Clients” Tab and click “New Client Secret” button:
Enter a User-friendly name in “Description” field…modify “Expires” to maximum term and click “Add” button:
Now click “Copy” button to copy the Client Secret “Value” (and not the “Secret ID”):
=========================
When setting up Teams Authentication (in Global Settings of Helpdesk App), you will need the following 3 values from the Azure App:
1. Application ID
2. Tenant ID
You can get the above two values from the “Overview” tab of the Azure App that we just created:
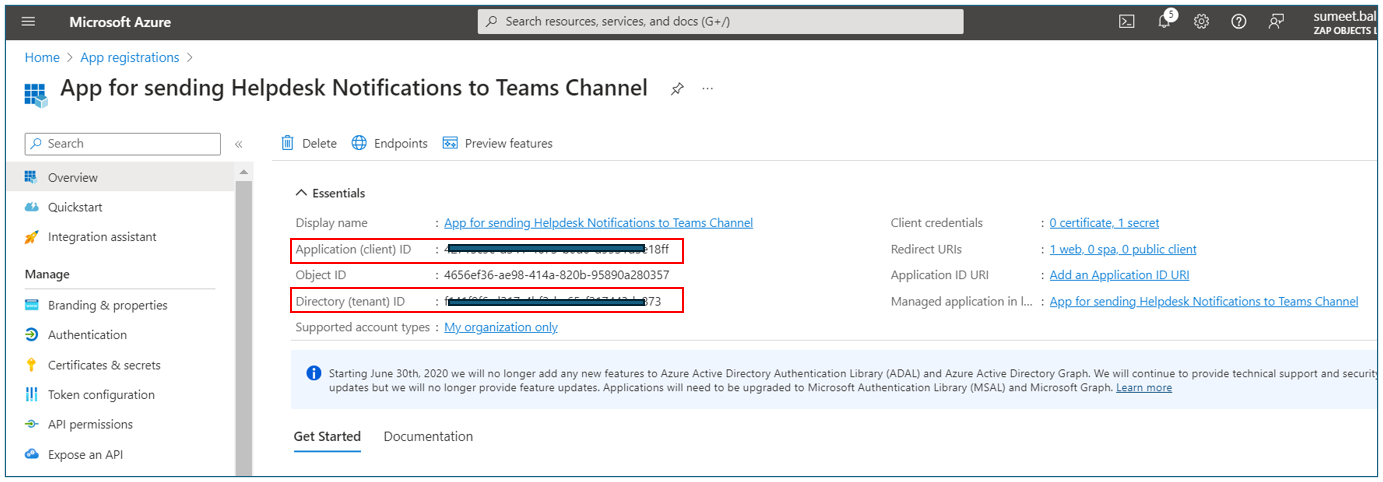
3. Client Secret Value // as retrieved in step 3